 By Audrey Hayes
Updated November 2026
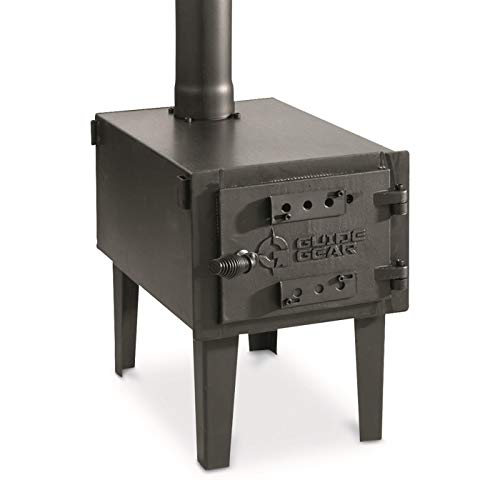
A camping wood stove DIY project lets you turn a sturdy steel container into a compact heater or cook stove for tents and cabins. In this guide you will choose a suitable container, cut an air inlet and a flue outlet, set up a safe base, and test the stove before it goes into a tent. Building one takes a few hours with basic metalworking tools.
Choose the Right Container and Size
Most DIY builders start with a steel drum, a paint can, or a stainless cooking pot sized for the space they need to heat. A small firebox of roughly 6 to 10 inches in diameter suits a one-person tent, while a 12-inch or larger body makes sense for a two-person shelter or a canvas wall tent. Avoid galvanized containers, since burning zinc coatings release fumes you do not want to breathe. Look for at least 1/16-inch steel, because thin sheet metal warps quickly under repeated heat cycles.
Shopping for one? See our guide: 6 Best Camping Wood Burning Tent Stove Models for Winter Trips (2026).
Cut Vents and Set Up the Flue
Airflow controls how hot and how cleanly the fire burns, so plan your openings before you start cutting.
- Mark a primary air inlet near the bottom of the firebox, sized about 1 to 2 square inches per pound of fuel you plan to burn at once.
- Cut a flue outlet near the top on the opposite side, with an opening that matches the stovepipe diameter, usually 3 to 4 inches.
- Drill a row of small holes around the upper body for secondary air, which helps burn off smoke.
- Deburr every cut edge with a file so you do not slice your hands during handling.
- Install a spark arrestor or screen at the top of the pipe and secure the pipe with high-temperature sealant rated for stove use.
Building a Safe Base and Heat Shield
Set the stove on a non-combustible base such as a steel plate or a few cinder blocks. Keep a heat shield or a gap of at least 18 inches between the stove body and any fabric, sleeping bag, or tent wall. Manufacturers of commercial tent stoves specify similar clearances, and many winter campers use them as a starting point for DIY builds.
Test, Ventilate and Light Safely
Before any overnight use, run a short test outdoors. Burn small kindling for 20 to 30 minutes and check that smoke rises cleanly through the pipe. Confirm the pipe joints stay sealed and the body does not glow dull red at the base. Only then move the stove into a shelter, and crack a vent or door to keep fresh air coming in. Carbon monoxide is a real risk in closed tents, so never sleep with a wood fire burning inside an enclosed space.
Common Mistakes to Avoid
- Using thin sheet metal that warps and leaks smoke within a few uses.
- Skipping the spark arrestor, which lets embers drop onto tent fabric.
- Placing the stove without a heat shield or enough clearance from walls.
- Burning wet or treated wood, which produces heavy smoke and creosote.
- Sleeping with the fire going in a sealed shelter.
Recommended Gear
- A heat-resistant stovepipe sealant helps keep joints tight, since leaks reduce draft and push smoke into the tent. View on Amazon
- A pipe spark arrestor screen catches embers before they reach fabric and nearby vegetation. View on Amazon
- A stainless steel stove pipe kit in the right diameter gives you a reliable flue connection. View on Amazon
Camping Wood Stove DIY FAQ
Is a DIY camping wood stove safe to use in a tent?
It can be, but only with proper clearances, a sealed flue, and adequate ventilation. Many campers choose a commercial tent stove instead for a tested design. Consult a professional before relying on a homemade heater for your safety.
What wood works best in a homemade stove?
Dry hardwood such as oak or hickory burns hot and produces less smoke. Avoid softwoods that spark heavily and avoid any treated or painted lumber.
Can I cook on a camping wood stove DIY build?
Yes, if you add a flat top plate or a cooking grate sized for your pots. Keep flames well away from the flue and monitor the fire closely while cooking.
Conclusion
A well-built camping wood stove DIY project gives you dependable heat for cold trips at a fraction of the effort of a full build from scratch. Focus on sound steel, correct vent sizing, and a safe base before anything else. For more context, see Camping Stove Wood Burner: A Step-by-Step Guide for Beginners and Using Camping Stove Indoors: A Safety-First Guide for Beginners.
Related reading
- Winter Camping Cooking: Stoves, Fuel and Water in the Cold
- Two Burner Propane Camping Stove: 4 Best Picks for Car Camping (2026)
- Two Burner Gas Camping Stove: 5 Best Picks Compared (2026)
Ready to choose one?
About Audrey Hayes
Audrey Hayes is part of our editorial team and reviews and edits our camping equipment guides, checking product details against manufacturer specifications and owner feedback.